English
 русский
 Deutsch
 日本語
日本語
The levers on your office chair control seat height, recline tension, recline lock, and sometimes seat tilt — and the cylinder underneath the seat is a pneumatic gas cylinder (also called a gas lift or gas strut), not a hydraulic one. Despite being commonly called a "hydraulic cylinder," it is filled with compressed nitrogen gas, not hydraulic fluid. When your chair slowly sinks, won't stay at the height you set, or collapses under your weight, the gas cylinder has failed and needs replacement — a straightforward repair that takes 15–30 minutes and costs $15–$40 for a universal replacement part, saving the cost of a new chair entirely.
Content
- 1 What the Levers on Your Office Chair Actually Do
- 2
- 3 What Is the Cylinder Under an Office Chair
- 4 Signs Your Office Chair Gas Cylinder Needs Replacing
- 5 How to Choose the Right Replacement Gas Cylinder
- 6 How to Replace an Office Chair Gas Cylinder: Step-by-Step
- 7 Safety Considerations When Handling Office Chair Gas Cylinders
- 8 When to Replace the Chair Instead of the Cylinder
What the Levers on Your Office Chair Actually Do
Most office chairs have between one and four levers or paddles underneath or on the side of the seat. Each controls a specific adjustment mechanism. The exact number and position varies by chair model, but the functions below cover the full range of what any lever on a standard office chair can do.
Lever 1: Seat Height Adjustment (Most Common)
This is almost always the most prominent lever — typically located on the right underside of the seat, often larger than the others. Pulling or lifting this lever while sitting in the chair lowers the seat; pulling it while standing (removing your weight) raises it. It works by activating a valve inside the gas cylinder that releases or engages the compressed gas charge. When you sit and pull the lever, your body weight compresses the cylinder downward. When you stand and pull the lever, the internal gas pressure pushes the cylinder upward to its extended position.
Lever 2: Recline Lock / Free Float Toggle
A second lever — often on the left side or positioned toward the rear — controls whether the backrest reclines freely or locks in a fixed upright or reclined position. In the unlocked (free float) position, the backrest moves with your body as you lean. In the locked position, the backrest is fixed at whatever angle you have set. If your chair feels like it collapses backward unexpectedly, check that this lever is engaged in the locked position.
Lever 3: Recline Tension Knob or Lever
Many chairs include a round knob (or occasionally a lever) located beneath the front center of the seat that adjusts how much resistance you feel when reclining. Turning it clockwise increases spring tension — making the backrest harder to push back — and counterclockwise reduces resistance for an easier recline. This is not a safety mechanism; it is a comfort adjustment. Heavier users typically need more tension; lighter users less.
Lever 4: Seat Tilt Lock (Forward Tilt / Seat Pan Angle)
Higher-end ergonomic chairs may have a fourth lever that controls the tilt of the seat pan itself — tilting the front edge of the seat downward to open the hip angle for more active, forward-leaning postures. This is independent of recline and is particularly useful when working at a desk for extended periods. Some chairs combine this with an anti-tilt lock that prevents the seat from tipping forward when you stand up.
| Lever / Control | Typical Location | What It Does | Present On |
|---|---|---|---|
| Height lever | Right underside of seat | Raises or lowers seat via gas cylinder | All adjustable chairs |
| Recline lock lever | Left or rear underside | Locks or frees the backrest angle | Most office chairs |
| Recline tension knob | Front center underside | Adjusts spring resistance of recline | Mid-range and above |
| Seat tilt lever | Front or side of seat | Tilts seat pan for forward posture | Ergonomic/premium chairs |
What Is the Cylinder Under an Office Chair
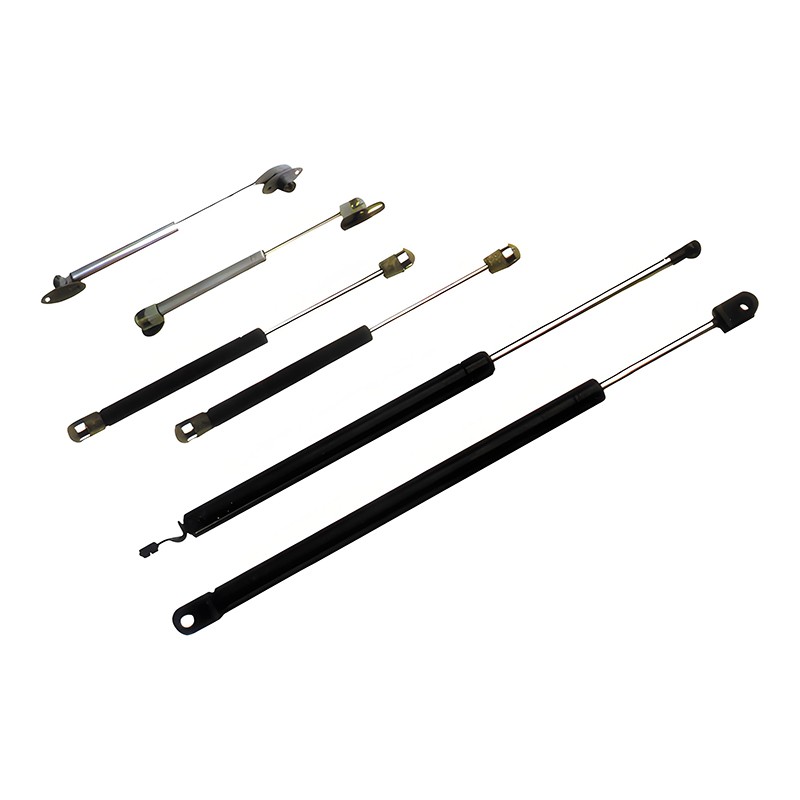
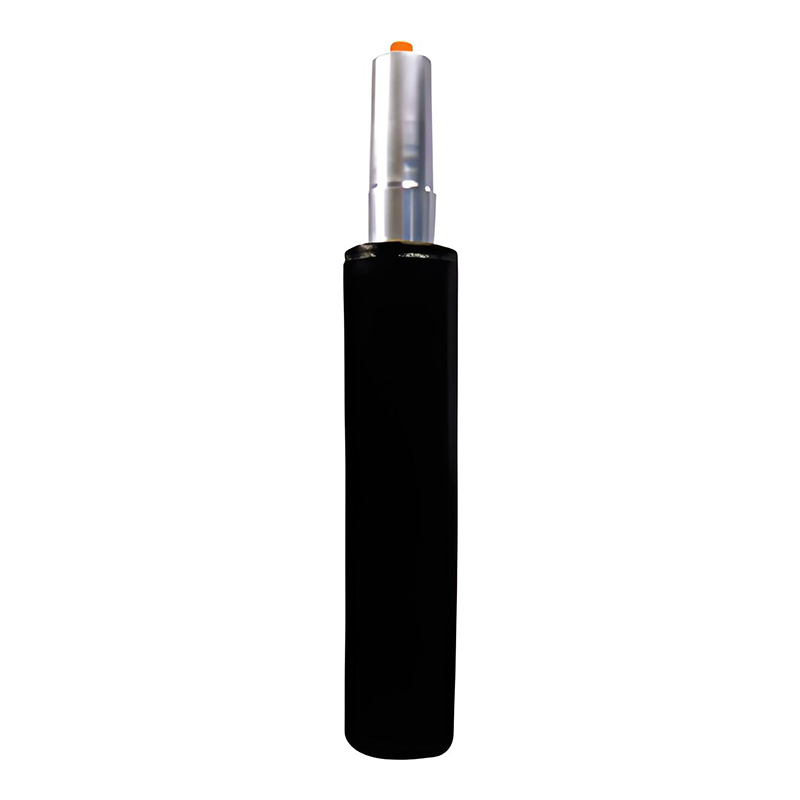
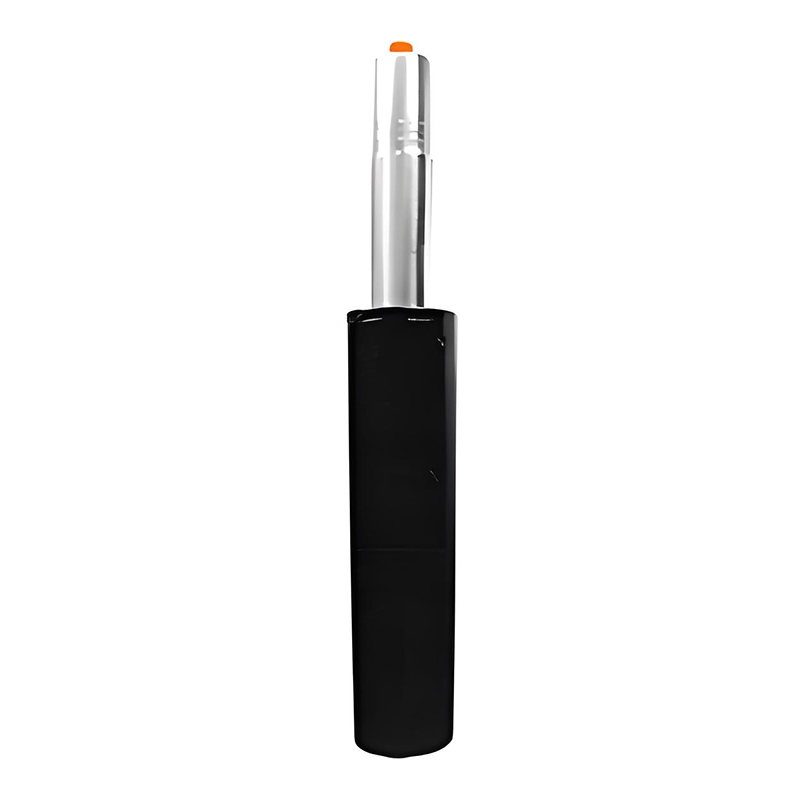
The cylinder connecting the seat mechanism to the wheeled base of your chair is a pneumatic gas cylinder — also referred to as a gas lift, gas strut, or gas spring. It is not hydraulic. Hydraulic systems use incompressible liquid (typically oil) under pressure; a chair's cylinder uses compressed nitrogen gas, which is why the correct term is "pneumatic cylinder" or "office chair gas cylinder."
Structurally, a standard office chair gas cylinder consists of an outer steel tube (the housing), an inner piston rod that slides in and out, a gas chamber filled with nitrogen at pressures of approximately 100–150 bar, and a valve actuated by the height adjustment lever. The cylinder taper-fits into the chair base (five-star caster base) at the bottom, and taper-fits into the seat mechanism plate at the top. No bolts, screws, or fasteners hold it in place — only friction from the tapered press fit.
Why It's Often Called a Hydraulic Cylinder
The confusion between "hydraulic" and "pneumatic" is widespread. Both types use fluid (liquid or gas) under pressure to transmit force, and both cylinders look similar from the outside. The term "hydraulic office chair cylinder" appears frequently in search queries and even some product listings, but virtually all modern office chairs use pneumatic gas cylinders, not hydraulic ones. A true hydraulic cylinder would require an oil reservoir, pump, and return lines — impractical for a portable chair application. When you search for "office chair hydraulic cylinder replacement" or "office chair pneumatic cylinder replacement," you are looking for the same part.
Signs Your Office Chair Gas Cylinder Needs Replacing
Gas cylinder failure is gradual in most cases, making it easy to miss the early signs. Recognizing the symptoms early prevents the more frustrating experience of a sudden seat drop under full body weight.
- Chair slowly sinks after you sit down: You adjust to the correct height, but within minutes you notice the seat has dropped. This is the most common symptom — the internal valve is no longer sealing completely, allowing gas to slowly bypass and the piston to compress under your weight.
- Chair sinks immediately when you sit: The gas charge has depleted entirely. The cylinder provides no resistance and collapses to its fully compressed position as soon as weight is applied. The height lever does nothing because there is no gas pressure left to drive the piston upward.
- Chair will not raise when you stand and pull the lever: Related to full gas charge loss. With no internal pressure, the cylinder cannot extend even without load on it.
- Visible oil or grease leaking from the cylinder: Some cylinders use a light grease on the piston seal. External leakage around the cylinder body indicates seal failure, which typically precedes or accompanies gas loss.
- Cylinder is stuck at maximum or minimum height and the lever has no effect: The valve mechanism that the lever actuates has seized or broken, preventing the gas from being released or retained. This is mechanical failure rather than gas loss, but replacement is the same solution.
How to Choose the Right Replacement Gas Cylinder
The good news is that office chair gas cylinders are highly standardized. The vast majority of office chairs worldwide use cylinders with the same taper dimensions — a 28 mm taper at the base (fitting into the chair base) and a 11 mm taper at the top (fitting into the seat mechanism). This means a single "universal" replacement cylinder fits approximately 95% of office chairs regardless of brand, including chairs from Staples, IKEA, Herman Miller lower-end models, Steelcase entry-level chairs, and most generic brands.
Key Specifications to Check Before Buying
- Stroke length (travel distance): The stroke is the distance the cylinder extends between its lowest and highest positions. Standard cylinders offer a stroke of 100 mm (approximately 4 inches), which provides a seat height range of roughly 43–53 cm from floor to seat. If your original chair had a larger height range, look for a "long stroke" cylinder with 125–150 mm travel.
- Total extended length: Measure the total length of your existing cylinder from the bottom of the base taper to the top of the seat taper when fully extended. Standard cylinders are approximately 230–250 mm extended length. Replacing with a significantly shorter cylinder will result in a lower maximum seat height.
- Weight capacity rating: Standard replacement cylinders are rated for 100–120 kg (220–265 lbs) user weight. Heavy-duty cylinders rated for 135–160 kg are available for larger users and provide more consistent height holding under higher loads.
- BIFMA or EN 1335 certification: Quality replacement cylinders carry BIFMA (Business and Institutional Furniture Manufacturers Association) or EN 1335 European standard certification, indicating they have passed cycle testing for a minimum of 100,000 actuations without failure. Uncertified budget cylinders from unverified sources may fail within months of installation.
| Cylinder Type | Stroke Length | Extended Length | Weight Capacity | Best For |
|---|---|---|---|---|
| Standard Universal | 100 mm | ~240 mm | Up to 120 kg | Most office chairs |
| Long Stroke | 125–150 mm | ~290 mm | Up to 120 kg | Tall users, standing desk use |
| Heavy Duty | 100 mm | ~240 mm | 135–160 kg | Larger users, bariatric chairs |
| Short Stroke / Low Chair | 70–80 mm | ~180 mm | Up to 100 kg | Children's chairs, low seating |
How to Replace an Office Chair Gas Cylinder: Step-by-Step
Replacing an office chair gas cylinder requires no specialist skills and minimal tools. The process takes most people 15–30 minutes on a first attempt and under 10 minutes once familiar with it. The most physically demanding part is separating the old cylinder from the chair base, which uses a friction taper fit that can be very tight after years of use.
Tools You Will Need
- Rubber mallet or wooden mallet (preferred over a steel hammer to avoid damaging the cylinder or base)
- Pipe wrench or adjustable wrench (for stubborn cylinders that won't release from the base)
- Penetrating oil spray such as WD-40 (helpful if the cylinder is seized in the base)
- Safety glasses (precautionary — compressed gas cylinders should never be drilled or cut)
- A flat work surface or towel to protect the chair seat when working upside down
Removal and Installation Process
- Turn the chair upside down on a flat surface, resting it on the seat cushion. This gives you clear access to the underside of the base and the cylinder connection points.
- Separate the seat mechanism from the cylinder top: With the chair inverted, the cylinder top taper sits inside the seat mechanism housing. Hold the seat mechanism firmly and strike downward on the top of the inverted base (now facing upward) with a rubber mallet to drive the cylinder free from the seat mechanism taper. Several firm strikes are often needed — the taper fit can be very tight.
- Separate the cylinder from the chair base: With the seat mechanism free, the cylinder remains held in the five-star base by the bottom taper. Hold the base steady and use the rubber mallet to drive the cylinder upward (in the inverted position, this means striking the top of the cylinder downward out of the base). If the cylinder is seized, spray penetrating oil around the taper joint, wait 10 minutes, then try again. A pipe wrench gripping the cylinder body can provide the leverage needed to twist and pull it free.
- Insert the new cylinder into the chair base: Push the larger end taper of the new cylinder firmly into the base socket by hand, then press it down onto a hard floor surface to seat the taper. The cylinder should feel secure and not rock. Do not hammer the new cylinder in — hand pressure is sufficient for the initial fit; it will seat fully under your body weight when used.
- Reattach the seat mechanism: Push the top taper of the new cylinder into the seat mechanism socket and press firmly. Again, hand pressure is sufficient — the taper will fully engage when the chair is used under load.
- Test the chair: Turn the chair upright, sit down, and operate the height adjustment lever. The seat should raise when you stand and lower when you sit and pull the lever. Confirm it holds your set height for at least 10 minutes without sinking.
What to Do If the Cylinder Won't Separate from the Base
Cylinders that have been in service for many years can corrode or mechanically bond to the chair base with significant force. If mallet strikes and penetrating oil do not free the cylinder within a reasonable effort, the most effective approach is to clamp the base in a vise and use a pipe wrench on the cylinder to apply rotational force while pulling upward. Rotation breaks the friction taper more effectively than purely axial force. In extreme cases where the cylinder is completely seized and the chair base has no other value, cutting the cylinder body (not the pressurized end) with a hacksaw and collapsing the remaining tube is a last resort — always wear eye protection when doing this and never apply heat to the cylinder.
Safety Considerations When Handling Office Chair Gas Cylinders
Office chair gas cylinders contain nitrogen compressed to approximately 100–150 bar (1,450–2,175 psi) — significant stored energy that requires respect during handling and disposal, even though the risk under normal replacement conditions is low.
- Never drill, cut, or puncture a gas cylinder: Rapid depressurization of a high-pressure gas cylinder can cause the cylinder to become a dangerous projectile. This applies equally to new and old, failed cylinders. Always dispose of old cylinders intact.
- Never apply heat to a cylinder: Heating a pressurized gas cylinder increases internal pressure unpredictably and can cause catastrophic failure. Do not attempt to free a seized cylinder using a blowtorch or heat gun.
- Dispose of old cylinders as pressurized metal: Many municipalities classify pressurized cylinders as special waste. Check local recycling guidelines — some scrap metal dealers will accept them; others require the pressure to be safely released by a professional before accepting the metal.
- Do not use a failed cylinder as a temporary fix with a height-lock kit: Height lock rings and clamp kits that fix the cylinder at a set height are sold as alternatives to replacement. These are acceptable short-term solutions but do not address the underlying cylinder failure — the cylinder provides no spring resistance and places all your body weight load on the clamp ring rather than distributing it through the gas charge as designed. Replacement remains the correct long-term solution.
When to Replace the Chair Instead of the Cylinder
A gas cylinder replacement costing $15–$40 makes clear economic sense for chairs originally valued at $100 or more. However, there are scenarios where replacement parts are not the right answer.
- Multiple simultaneous failures: If the cylinder, casters, armrests, and seat foam have all degraded together, the cumulative repair cost may approach or exceed the value of a comparable new chair. Assess the total repair list before committing to parts.
- Cracked or broken chair base: The five-star base takes the full structural load. A hairline crack in a plastic or cast aluminum base is a safety risk that no amount of cylinder replacement will fix — a broken base can collapse suddenly under load. Replace the base or the whole chair.
- Seat mechanism damage: If the taper socket in the seat mechanism plate is damaged or cracked, the new cylinder will not seat securely, creating an unstable and unsafe connection. Replacement seat mechanisms are available for some chair brands but not all — check parts availability before buying the cylinder.
- Chairs under $50 original value: For very inexpensive chairs, the time and effort of replacement may not be justified when a comparable replacement is available at low cost. The repair decision is ultimately a time-versus-cost calculation based on the chair's remaining useful life.