English
 русский
 Deutsch
 日本語
日本語
Content
- 1 Office Chair Gas Cylinder: What It Is and How It Works
- 2 Signs That Your Chair Gas Cylinder Needs Replacement
- 3 How to Measure Your Chair Gas Cylinder for Replacement
- 4 How to Remove a Gas Cylinder from a Chair
- 5 How to Replace the Gas Cylinder on an Office Chair, Desk Chair, or Gaming Chair
- 6 Can You Fix a Gas Cylinder Rather Than Replace It
- 7 Selecting the Right Replacement Gas Cylinder
- 8 How Long Should a Replacement Gas Cylinder Last
Office Chair Gas Cylinder: What It Is and How It Works
The gas cylinder in an office chair, desk chair, or gaming chair is the mechanism that controls seat height. It sits between the chair base (the five-star wheeled base at the bottom) and the seat mechanism (the tilt and adjustment plate that the seat pad mounts to), and it allows the chair to be raised or lowered by pressing the height adjustment lever while the user's weight is on or off the seat.
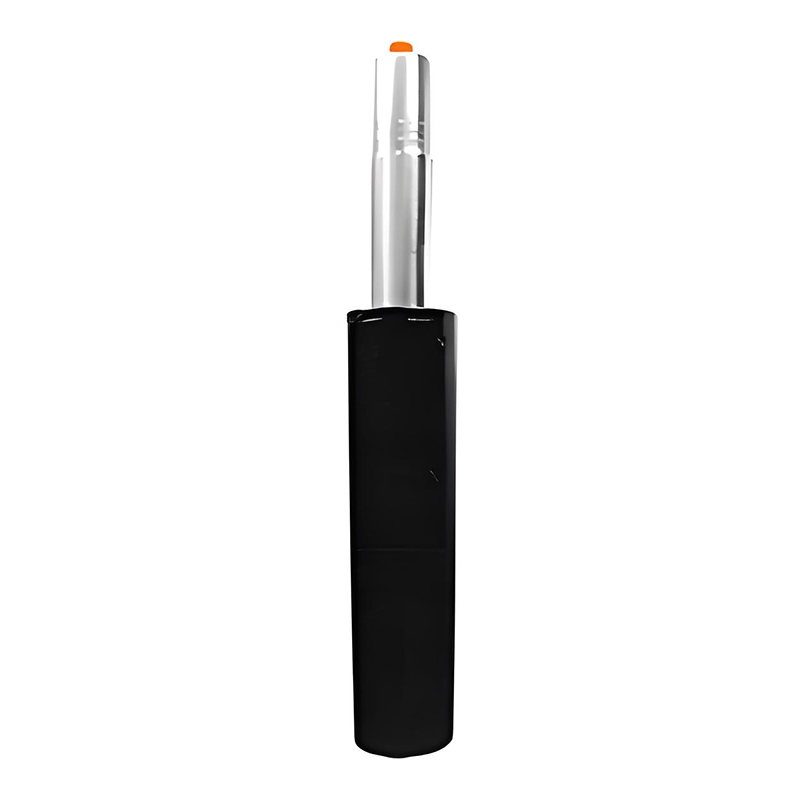
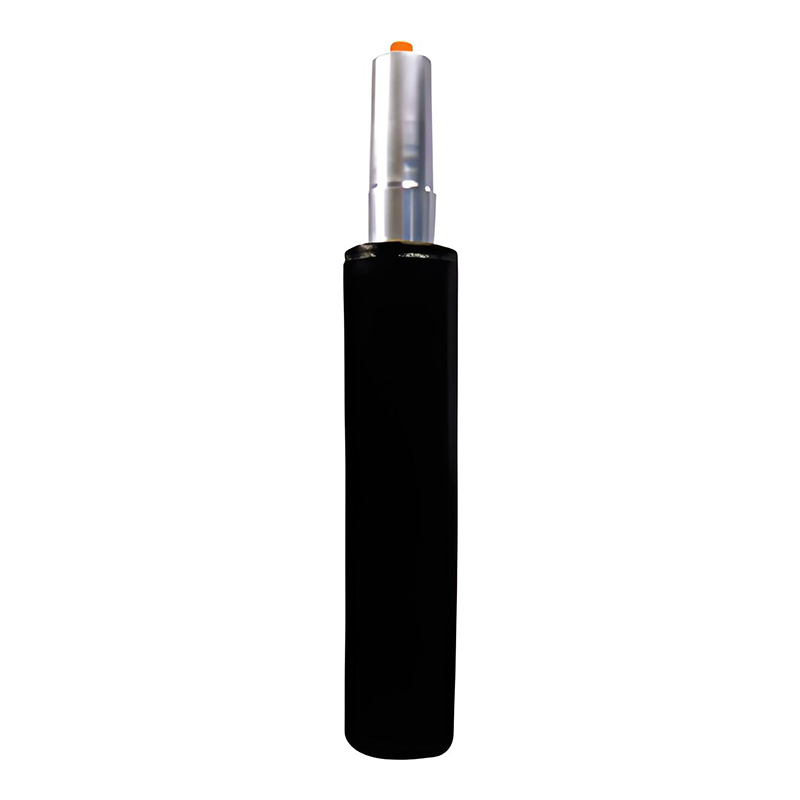
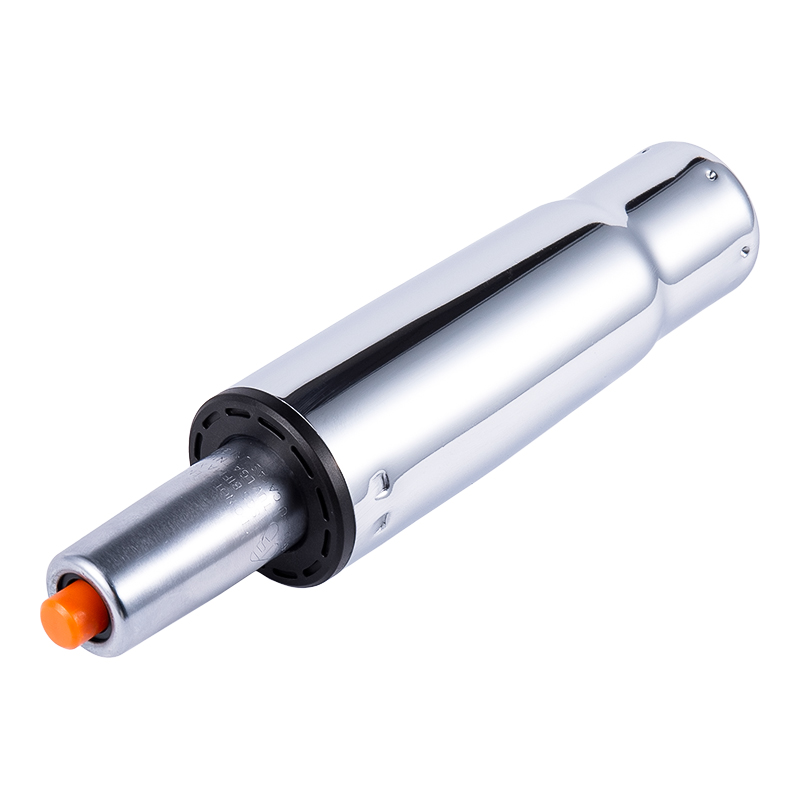
The cylinder itself is a pneumatic piston assembly -- a steel outer cylinder containing a piston rod and a sealed chamber of compressed nitrogen gas. When the lever is pressed while the user sits in the chair, the user's weight compresses the gas and the seat descends. When the lever is pressed while the user stands up, the gas pressure pushes the piston upward and the seat rises. The nitrogen gas is what provides the smooth, controlled resistance that distinguishes a functioning chair cylinder from a failed one.
A gas cylinder that sinks slowly when you sit down -- even when you have not pressed the lever -- is the most common sign of failure. The internal seals have worn or degraded, allowing the compressed gas to escape gradually past the piston. Once the gas pressure drops below the threshold needed to hold the user's weight, the chair will no longer maintain its set height and will need a replacement gas cylinder.
The good news is that the gas cylinder is a replaceable, standardized component. The replacement process is straightforward with the right tools, and a new cylinder typically costs far less than a new chair, making cylinder replacement the most economical and practical solution when a chair's height adjustment fails.
Signs That Your Chair Gas Cylinder Needs Replacement
Not every height adjustment problem requires a new gas cylinder. Understanding the specific symptoms of a failed cylinder -- versus other chair adjustment problems -- helps confirm that cylinder replacement is the right fix before purchasing parts.
- The chair slowly sinks during use: This is the defining symptom of a failed cylinder. You set the height, sit down, and within minutes (or seconds in badly failed cylinders) the seat has dropped noticeably. This indicates loss of gas pressure through worn internal seals and is not fixable -- the cylinder must be replaced.
- The chair only goes to one height: If the chair no longer responds to the height lever -- it stays at the lowest position permanently -- the cylinder may have fully lost pressure or the lever mechanism may have become disconnected. Check whether the lever still physically moves before assuming cylinder failure.
- The height range has decreased: If the chair still adjusts but the highest position has dropped significantly over time, the cylinder has partially lost pressure. The remaining range will continue to shrink until the cylinder fails completely.
- The cylinder makes cracking or clicking noises during height adjustment: Internal component wear or damage inside the cylinder can produce noises during actuation. If the height adjustment still functions but is accompanied by unusual sounds, the cylinder is approaching the end of its life.
- Oil or residue around the cylinder: Some cylinders show external signs of seal failure through visible residue or discoloration around the cylinder body at the point where the piston rod enters the outer cylinder. This is an external indicator of internal seal degradation.
How to Measure Your Chair Gas Cylinder for Replacement
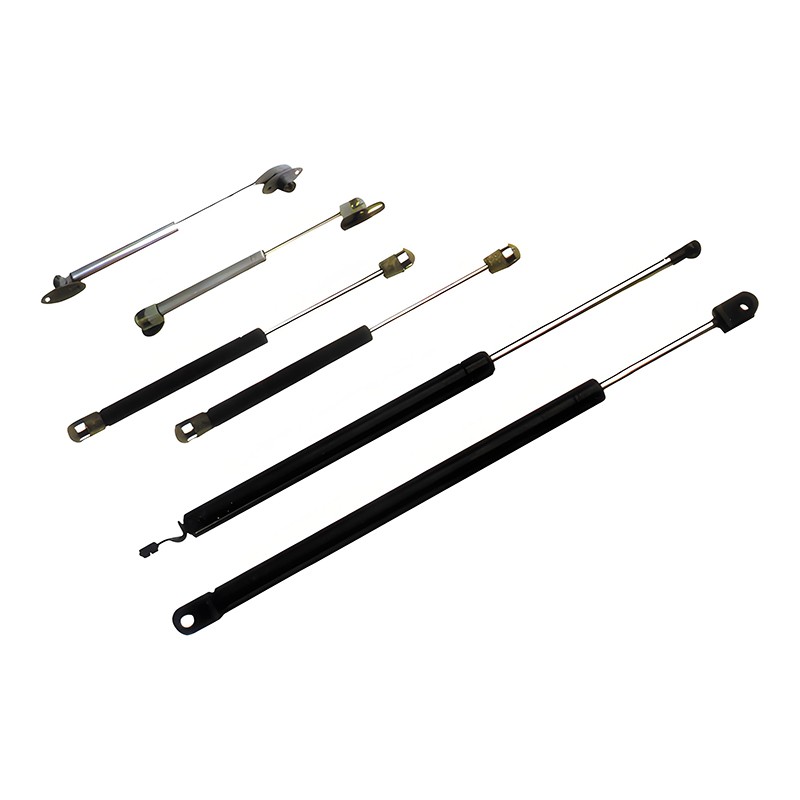
Before purchasing a replacement cylinder, you need to confirm that the replacement will fit your chair. Office chair gas cylinders are highly standardized -- the vast majority of office chairs, desk chairs, and gaming chairs use cylinders with the same taper dimensions at the top (seat mechanism end) and bottom (base end), which means a universal replacement cylinder will fit most chairs. However, the stroke length (the height range the cylinder provides) and the overall installed length vary between cylinder classes, and selecting the wrong class will result in a chair that is either too low or too high for the user.
Key Measurements to Take
With the cylinder removed from the chair (see the removal instructions in the next section), measure the following:
- Overall length in the extended position: Measure from the bottom of the lower taper (where it inserts into the base) to the top of the upper taper (where it inserts into the seat mechanism) with the cylinder fully extended. This tells you the maximum installed height of the cylinder.
- Overall length in the compressed position: Press the cylinder against the floor to compress it fully (it will compress easily once removed from the chair), then measure the same end-to-end distance. The difference between extended and compressed length is the stroke -- the range of height adjustment the cylinder provides.
- Taper dimensions: For most standard chairs, the upper taper is 28mm in diameter at the tip (fitting the seat mechanism hole) and the lower taper is 22mm at the tip (fitting the base). Confirm these match the standard before ordering, as some heavy-duty chairs use larger taper dimensions.
For most standard office and gaming chairs, a Class 3 cylinder (approximately 100mm to 140mm stroke, 250mm to 320mm extended length) is the correct replacement. Class 4 and Class 5 cylinders provide greater stroke and are used for taller chairs, sit-stand stools, and chairs intended for users requiring more height range. If in doubt, matching the measurements of the original cylinder is more reliable than trusting a generic size recommendation.
How to Remove a Gas Cylinder from a Chair
Removing an office chair gas cylinder is the step that most people find challenging, because the tapered connections at the top and bottom of the cylinder are friction fits -- they are designed to be extremely tight. The cylinder will not simply pull out by hand in most cases, particularly on chairs that have been in use for years. A pipe wrench or a dedicated cylinder removal tool makes the process significantly easier, but the job can also be done with a rubber mallet and patience.
Tools You Will Need
- Rubber mallet or hammer
- Pipe wrench or adjustable wrench (with jaw protection to avoid scoring the cylinder)
- Safety gloves (the cylinder body can have sharp edges after prolonged use)
- A flat, clear work surface at a comfortable height
Step-by-Step Removal Process
- Turn the chair upside down: Place the chair on its side on a flat surface, or invert it completely so the wheeled base is facing upward. Working with the chair inverted gives you clear access to the base connection and more leverage.
- Remove the wheeled base from the cylinder: With the chair inverted, the base is at the top. Grip the base firmly and pull it straight upward while holding the cylinder. In many cases the base will pull free from the lower taper with firm upward pulling. If it does not move, use a rubber mallet to tap the cylinder downward through the base socket from above -- the taper runs narrower toward the tip, so driving the cylinder downward through the base socket will loosen it. Do not hit the cylinder from the side, as this can bend the body.
- Separate the seat mechanism from the upper taper: With the base removed, the cylinder is still held in the seat mechanism by the upper taper. Grip the seat mechanism and the cylinder body firmly and pull apart. If the connection is tight, use a pipe wrench or adjustable wrench on the cylinder body (protect the cylinder surface with cloth or tape to prevent jaw scoring) and lever against the seat mechanism while pulling straight. Alternatively, insert a flathead screwdriver into the slot in the seat mechanism socket (if one is present) and lever outward to widen the grip slightly before pulling.
- Work the cylinder free with a twisting motion: A combination of pulling and rotating (the cylinder does not have a threaded connection, so rotation is not mechanically necessary, but the twisting motion helps break the static friction of the taper connection) usually frees a stubborn connection more easily than pulling alone.
If the cylinder is completely seized -- which can happen after years of use when metal oxidation has bonded the taper connection -- applying penetrating oil (such as WD-40 or a dedicated penetrant) around the taper connection point and allowing it to soak for 15 to 30 minutes before attempting removal can help break the bond. Allow the penetrant to drain before installing the new cylinder.
How to Replace the Gas Cylinder on an Office Chair, Desk Chair, or Gaming Chair
With the old cylinder removed and the correct replacement cylinder in hand, the installation process is straightforward. The tapered connections work in your favor during installation -- the friction fit that made removal difficult makes installation secure and tool-free.
Installing the Replacement Cylinder
- Orient the new cylinder correctly: The upper taper (larger diameter, shorter taper) inserts into the seat mechanism. The lower taper (smaller diameter at the tip) inserts into the center socket of the wheeled base. Most replacement cylinders are clearly labeled or have the wider end marked as the top. If unsure, the plastic safety clip or button that actuates when the lever is pressed is located at the top (seat mechanism end) of the cylinder.
- Insert the upper taper into the seat mechanism: Push the upper taper firmly into the seat mechanism socket. You should feel it seat positively into the taper. Press firmly by hand -- it does not need to be hammered at this stage, as the user's weight during use will drive it firmly home over time. Confirm the seat mechanism can rotate freely on the cylinder (this rotation is normal and allows the seat to swivel).
- Insert the lower taper into the wheeled base: Push the lower taper firmly into the center socket of the wheeled base. Again, hand pressure is sufficient to seat it initially. Place the assembled chair upright on the floor.
- Test height adjustment: Sit in the chair and press the height lever. The seat should descend smoothly under your weight. Stand up and press the lever again -- the seat should rise fully to the extended position. Confirm the chair holds height without sinking after you release the lever and place your full weight on the seat.
- Confirm the tapers are fully seated: After the first few adjustments, the taper connections will have been driven home by your weight. The cylinder is now correctly installed and the chair is ready for normal use.
Gaming Chair Gas Cylinder Replacement: Any Differences?
Gaming chairs use the same gas cylinder design as standard office chairs. The cylinder dimensions, taper specifications, and replacement process are identical. The primary difference is that gaming chairs often have higher weight ratings -- they are frequently used by larger individuals for extended periods -- which means selecting a heavy-duty cylinder (rated for 150kg or more) rather than a standard-duty cylinder (rated for 100 to 120kg) is advisable for gaming chair replacement if the original cylinder was a heavy-duty specification. Check the weight rating marked on the original cylinder or the chair's product specifications before selecting the replacement class.
Can You Fix a Gas Cylinder Rather Than Replace It
The short answer is no -- a failed gas cylinder cannot be meaningfully repaired by the end user. The cylinder is a sealed, pressurized unit manufactured and tested under controlled factory conditions. Once the internal seals have failed and the nitrogen gas has escaped, there is no practical way to recharge or re-seal the cylinder without specialized equipment, and the cost of any such repair would significantly exceed the cost of a new replacement cylinder.
There is, however, a temporary workaround -- often called the PVC pipe fix -- that some people use to stabilize a slowly sinking chair while a proper replacement cylinder is sourced. This involves inserting a length of PVC pipe (with an appropriate inner diameter to fit over the cylinder body) around the cylinder shaft to physically block the cylinder from compressing. The chair then sits at a fixed height, typically near the lowest position, without adjustment capability.
The PVC pipe approach is a temporary workaround, not a repair. It eliminates the ergonomic adjustability of the chair entirely and should not be treated as a long-term solution. A replacement cylinder is the correct fix, and at typical replacement cylinder prices, there is little economic argument for prolonging the workaround beyond the time needed to order and receive the correct part.
What can sometimes be adjusted or repaired is the lever mechanism that actuates the cylinder, if the chair fails to adjust height despite the cylinder itself being functional. If pressing the lever has no effect but the chair does not sink during use, the problem may be a disconnected or worn actuator clip rather than cylinder failure -- the clip that connects the lever to the cylinder release button may have slipped or broken. This is a simple inspection and in many cases a simple fix with a new clip or plastic cap, and it is worth checking before assuming the cylinder has failed.
Selecting the Right Replacement Gas Cylinder
Replacement gas cylinders for office chairs, desk chairs, and gaming chairs are widely available from office furniture suppliers, online retailers, and specialist chair components suppliers. The market is well-standardized, with the vast majority of chairs using cylinders that fall within a small number of dimension classes, and universal replacement cylinders fitting most chairs without modification.
Gas Cylinder Classes and Dimensions
| Class | Stroke (approx.) | Extended Length (approx.) | Typical Application |
|---|---|---|---|
| Class 2 | 80mm | 220 to 250mm | Lower-range office and task chairs, shorter users |
| Class 3 | 100 to 140mm | 270 to 320mm | Most standard office, desk, and gaming chairs |
| Class 4 | 150 to 160mm | 340 to 380mm | Tall chairs, extended height range, standing desk chairs |
| Class 5 | 175 to 200mm | 400mm and above | Bar height chairs, sit-stand stools, drafting chairs |
Weight Rating
Gas cylinders are rated for maximum user weight. Standard cylinders are typically rated for 100 to 120kg. Heavy-duty cylinders for high-weight-capacity chairs are rated for 150kg to 200kg or more. Always match the weight rating of the replacement cylinder to the original specification or to the weight of the heaviest user of the chair. Using a standard-duty cylinder in a chair rated for a heavier user will result in accelerated seal failure and premature cylinder sinking.
Quality and Safety Certification
Office chair gas cylinders are pressurized components, and quality matters for safety as well as performance. Cylinders manufactured to BIFMA (Business and Institutional Furniture Manufacturers Association) standards or EN 1335 (European office furniture standard) have been tested for structural integrity, pressure retention, and cycle life under defined test conditions. Purchasing cylinders from reputable suppliers who can confirm the testing and certification of their product is advisable, particularly for heavy-duty applications or for chairs used by multiple users in a commercial environment. Very low-cost cylinders from unverified sources may not have been tested to recognized standards and can fail prematurely or, in extreme cases, present a safety risk if the pressurized body fails structurally.
How Long Should a Replacement Gas Cylinder Last
A quality replacement gas cylinder for an office or gaming chair should provide several years of reliable service under normal use conditions. The actual service life depends on the quality of the cylinder, the weight of the user, the number of height adjustments per day, and the environmental conditions in which the chair is used (temperature extremes and high humidity can affect seal longevity).
Cylinders manufactured to BIFMA and EN 1335 testing standards are tested for cycle life (typically 100,000 adjustment cycles or more), which represents many years of daily use at realistic adjustment frequencies. A cylinder that begins sinking within the first few months of installation either had a manufacturing defect (return it under warranty) or was not correctly matched to the user's weight (a heavier-duty cylinder may be required).
There is no practical maintenance action that extends the service life of a gas cylinder -- the sealed internal components are not accessible for service. The cylinder is a use-and-replace component, and when it fails again after years of service, the replacement process described above applies directly. Given that replacement cylinders are widely available, inexpensive relative to a new chair, and installable in under 30 minutes without specialist tools or skills, gas cylinder replacement is one of the most cost-effective chair repairs available.